17-Sep-2025
ICEGATE Processes Requiring Digital Signature Certificate (DSC)
If you are dealing with imports or exports in India, you must have come across ICEGATE. It's the official portal of Indian Customs for e-filing of shipping bills, bills of entry, and other customs-related documents. One of the most important aspects of filing through ICEGATE is the Digital Signature Certificate (DSC).
The DSC ensures secure authentication and provides a legally recognized digital signature for your documents. Without it, you simply cannot submit a shipping bill for export or a bill of import entry.
Want to buy ICEGATE Digital Signature? Get it from Capricorn CA now!
What is DSC and Why You Need It?
A Digital Signature Certificate (DSC) is similar to a physical signature, but in digital form. In India, it is issued by authorized Certifying Authorities (CAs) like Capricorn CA. A DSC is essential for all Class 3 e-filings on ICEGATE. It is mandatory for:
- Submitting a Shipping Bill (for exports)
- Submitting a Bill of Entry (for imports)
Important: Always use the official ICEGATE portal https://www.icegate.gov.in. There is no substitute for the official site.
Note: Always use the official ICEGATE portal.
PRE-WORK (one-time)
1. Token / USB driver
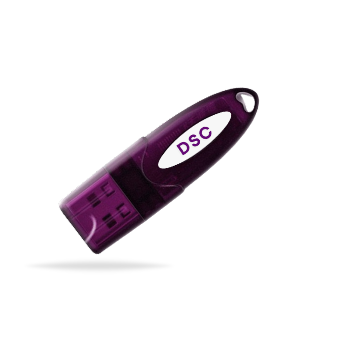
Install the driver that came with your DSC token (Capricorn CA).
Plug in the token; the green LED must glow.
2. Browser
Internet Explorer 11 or Edge-IE mode works best.
Add “*.icegate.gov.in” to Trusted Sites and pop-up blocker exceptions.
STEP-BY-STEP ON ICEGATE
Below is a step-by-step, screen-by-screen guide that shows exactly where and how a DSC (Digital Signature Certificate) is used on ICEGATE for the two documents that must be signed:
1. Shipping Bill (export)
2. Bill of Entry (import)
The same flow works for both; only the form fields change. Follow the steps once and you can repeat them for every future filing.
STEP 1 – LOGIN
1.1 Browse https://www.icegate.gov.in → click icegate login (top-right).
1.2 Enter user-id, password, captcha → you are inside the icegate dashboard.
(No DSC yet – this is just icegate login old style.)
STEP 2 – CHOOSE THE DOCUMENT TYPE – “Shipping bill” vs “Bill of entry”
2.1 After login you land on the Dashboard.
2.2 Left menu → “e-Filing” →
- For exports: click “Shipping Bill”
- For imports: click “Bill of Entry”
2.3 Sub-menu → “New SB/BE” (or “Upload SB/BE XML” if you prepared offline).
Screen title now shows icegate shipping bill or icegate bill of entry, depending on choice.
STEP 3 – FILL THE FORM – “icegate shipping bill” / “icegate bill of entry”
3.1 Complete every tab: Basic details, Item details, Invoice, Duty, etc.
3.2 At the bottom you will see two buttons:
- “SAVE DRAFT” (no DSC)
- “SUBMIT & SIGN” (DSC mandatory) – this is where icegate sb and icegate diverge.
Save draft as often as you like; signing happens only at the end.
STEP 4 – ATTACH DOCUMENTS (“enquiry icegate” optional but common)
4.1 Click Attach Documents → upload PDF invoices, packing list, LUT.
4.2 Press Upload & Save.
Still no DSC – just housekeeping before icegate shipping bill status turns green.
STEP 5 – VALIDATION – pre-check before Boe icegate / shipping bill status
5.1 Click Validate.
5.2 Fix errors until you see “Validation successful” – guarantees smooth boe status on icegate later.
STEP 6 – SIGN with DSC – core of icegate sb, icegate be, icegate shipping bill
6.1 Click SUBMIT & SIGN – the moment every shipping bill, bill of entry, boe status at icegate keyword leads to.
6.2 Pop-up “Select Certificate” → pick your name → Sign.
6.3 Enter token PIN → Java signs the XML.
6.4 Success screen gives you the 12-digit File Number – capture it for shipping bill status / boe status on icegate tracking.
STEP 7 – PAY DUTY (only for Bill of Entry if duty > 0)
7.1 If duty > 0, click Pay Now → ICEGATE payment gateway.
7.2 Finish via net-banking or cash ledger – no DSC needed again.
STEP 8 – TRACK STATUS – icegate shipping bill status, boe status, icegate tracking
8.1 Dashboard → Track Document Status → enter SB/BE number & date.
8.2 Watch the sequence:
Signed by user → Submitted to Customs → Under Customs → OOC given (exports) / Assessment finished (imports).
This is the real-time shipping bill status and BOE status at icegate, everyone Googles.
AMEND – same DSC again
Need to change something? Dashboard -> Amendment -> select SB/BE → edit → SUBMIT & SIGN → token PIN → done.
Amendment also appears in the icegate shipping bill status and the boe status on icegate feeds.
Need a DSC for ICEGATE? Buy Capricorn Digital Signature today!
Conclusion
Filing a Shipping Bill or Bill of Entry on ICEGATE does not need to be intimidating. With the DSC ready, and by following this step-by-step process, your document submission becomes smooth, secure, and error-free. Once you are familiar with the workflow, you can complete filings in minutes instead of hours.


